How to use the Burn Portal
Multi Token Burn Portal Interface
The Multi Token Burn Portal allows users to interact with burn portal flows for both BabyDoge Coin and active tokens set by the contract admin. Are you a project interested in adding your token to the burn portal? Contact us for a partnership inquiry!

 Burn Section
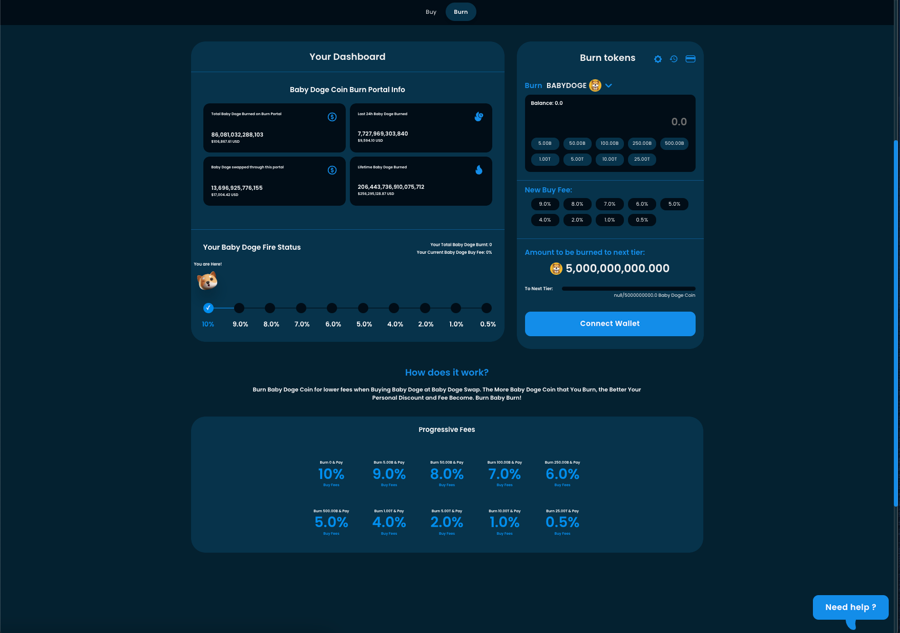
In the Burn section, you can find statistics and information on the left side, in "Your Dashboard", and the main widget on the right side. Let's see how the widget works:
Choose a token you want to burn. By default, BabyDoge is selected, but you can opt for any other active token.
After selecting the token, you will see discount tiers and token buy fees for the chosen token.
Connect your wallet to the DEX (Decentralized Exchange).
Enter the value of tokens you want to burn or simply click on the desired discount tier fee (labeled as new buy fee). Burning more tokens will grant you a higher buy discount for the chosen token.
Click the "Approve" button to approve the tokens for burning. Wait for the transaction to complete, and the tokens will be burned. After the burn transaction is completed, you will see your new fee amount.
Math Calculation Example for Burn Portal
Let's take an example to better understand the calculations:
Suppose TokenX is a fee on transfer token with a 20% transfer fee. The manager adds TokenX with a baseTax of 2000 and specifies the fee receiver and discounts.
If the user burns 100 tokens, they will receive a 10% discount, allowing them to purchase TokenX with an 18% fee.
If the user burns 500 tokens, their discount will be 50%, and they can purchase TokenX with a 10% fee.
If the user burns 1000 tokens, they will receive a 100% discount, enabling them to purchase TokenX without any fee.